Friday, September 22, 2017

Bonsai 101, branch ramification and how can I get some

There are many words and phrases used in bonsai. One of the bigger ones is the word ramification. We all know what ramification is, but can we explain it? For all of you that speak a romance language, we can plainly see the root word rama. Which we understand to be a branch. So, ramification is the way branches grow. Booyeah, hit it on the head. Shortest post ever. No, I wish but in bonsai, we like to make things complicated.


In bonsai, we are looking for miniaturization. We are looking to reduce the size of the tree by reducing the size of the trunk, and the branches, and the leaves. How do we do that? Well, here is the basic theory:
First, we must let branches grow from the trunk. These branches we will call primary branches. These primary branches should grow around the tree in strategic places. The primary branches will become the “skeleton” that will support the rest of the tree’s growth.


Once you have established the primary branches and the tree will grow new branches on the primary branches. These new branches are called secondary branches. Because these branches are younger they should be thinner. A third set of branches will grow on the secondary branches and so on and so forth. These branches will be thinner than the secondary branches. As the branches get thinner the leaf size will also reduce.


The Ideal pattern for branch ramification is to have a pair of new branches grow from the tip of each level of branches. I’ll illustrate below.


This is the ideal situation. Of course, we all know that ideal may not happen consistently in bonsai. There a few things you have to take in mind when you are planning out a plants growth and ramification. Understand your plant species growing habit. Azaleas grow very different from ponderosa pine trees. Learn when and how to prune. This will help develop small compact branches.

You may be asking your self why do the branches have to grow in pairs? Let me show you what happens:
The branch keeps on growing but you only have the one branch. where you could have had 8 branches with small leaves now you have one. There is no ramification.


One last thing is this very interesting article on the growth habit of trees (http://ofbonsai.org/techniques/pruning-trimming-and-pinching/ramification-techniques). There are two types of plants. First, we have plants like palm trees and most pine trees. These have a dominant growth usually at the top. The dominant tip seems to keep growing the strongest and fastest. These type of growth especially among conifers leaves a conical shape on the tree. These trees are monopodial.

Monopodial Pinion Pine

Next, you have trees that grow new branches on lateral buds on different branches. Those trees do not have a dominant growing point, so these trees grow in a much more round shape like many of the deciduous trees. These group of trees is called sympodial.


I think it is important to understand this so we can plan how our trees are going to grow. Cheers.

Friday, September 15, 2017

Understanding the why in everything we do/ are we automatons?


Do you contemplate these questions? Why do I work the job I do? Why do I do the things I do? Why ask why?


Sometimes we do what we do because that's how we have done it for years. Sometimes we do things because it takes too much effort to change, or maybe we do not know any better?


In bonsai, there is this culture of reading things on the internet and taking things at face value. When we are new this is understandable. We do not know anything. As time progresses we hold on to those “rules” and sometimes we do not let go even though maybe we should.


A certain bonsai professional who I like to quote (Ryan Neil) said that we should know why we do what we do. He likes to ask if anybody repots on a schedule. Then he points out that there are only three reasons to repot a tree. One reason is the loss of percolation, another is decomposition and finally, change of style. Those reasons are not dictated by a timetable.


He asks this is because he wants the bonsai community to stop doing things out of sheer tradition. That we should know the horticultural reasons why we do the things we do in bonsai.


“In anything, we do in bonsai there has to be a reason if not it is about us. Right? This is not about us. Bonsai is not about us bonsai is about the tree.” Ryan Neil

Let's dig a little deeper. let's find out what we are really doing to our trees.

That's it. Short and sweet. Something to ponder. Cheers.


Friday, August 25, 2017

Fertilizers and bonsai, the war between organics and inorganics


Growing and fertilizing plants in pots is different than growing and fertilizing plants in the ground. The soil in pots leach out fertilizer with every watering. I think everybody knows that or is aware. That is why we add fertilizer to bonsai.


One day I was reading a gardening article on fertilizer. To my surprise, the article said that plants do not distinguish between molecules of organic and synthetic fertilizers.


Robert Palvis from gardenmyths.com says, “Let’s look at nitrate molecules in more detail. What is the difference between a nitrate molecule from a synthetic fertilizer and an organic fertilizer? The pictures below show the two molecules.  
                        Synthetic                                   Organic


Can you see the difference??
There is no difference. A nitrate molecule from either source is exactly the same. Most importantly plants can’t tell the difference between a nitrate molecule from a synthetic source and a nitrate molecule from an organic source.
I’ll repeat the last sentence since it is one of the biggest gardening myths. There is absolutely no difference between a nitrate molecule from a synthetic source and a nitrate molecule from an organic source.” (http://www.gardenmyths.com/what-is-organic-fertilizer/)

On another gardening website, it said that the reason a gardener should use organic fertilizer is to build up soil structure. The next thought was, why do I need to build soil structure in a soilless bonsai potting mix? The answer: I do not need to. This benefit of organic fertilizer is completely at odds with using “boon mix” type of soils.  
It seems the negative thing about synthetic fertilizers is that you have to learn how to use them properly because the margin for error is larger compared to organic fertilizer.


However, If you use organic fertilizer are you maximizing the tree's potential? I would say not.


The paradox is that we put a tree in a pot with soil less potting soil. We bend break and shape the tree. We stunt its growth in a small pot. Then we say oh no, manufactured synthetics are one step too far. That seems counterintuitive to me. To me, it seems that synthetic fertilizers give you more control over how much salts you give the tree relative to the concentration of the dosage.  


A quote from sfgate.com, “The nutrients and exact elements available from an organic fertilizer, such as manure or compost, can only be guessed at without laboratory testing. This means you’re giving an inexact application that may or may not meet your plants’ needs. By comparison, applying inorganic fertilizers is simple, because the amount of a given element and the rate of application are known.” (http://homeguides.sfgate.com/inorganic-fertilizer-vs-organic-fertilizer-39528.html)


Organic Fertilizer pic by F@c@ https://www.flickr.com/photos/16705181@N00/20588210/


I looked up the big differences between synthetic and organic fertilizers you may have at home.

Organic- Needs organisms to break down, cold slows down the process, Nutrients are at very low levels. It takes longer to break down the organic fertilizer to stuff your plants can use. This prolongs the life of the fertilizer.


Chemical- the Larger margin for error (unless you use the Walter Pal method for feeding). Fertilizer can be used by plants as soon as it is applied. It is cheaper but not as easy to use as organic fertilizer. It is water soluble so it is leached out very quickly.


I'll give you that by using organic fertilizer you will never burn your trees.  Here is the thing, we who do bonsai create these impossible tasks related to taking care of bonsai. Here is an example. Some people have a calendar on when to prune candles on Japanese black pine. They say that week one you cut off strong shoots, then week two medium strength shoots, then week three prune weak shoots or something similar. My hero Ryan Neil says that is a bunch of nonsense. He says prune all of the candles back at the same time. Why do we like to complicate our lives? Is it not easier to learn how to properly use synthetic fertilizer? Can we learn what to do so that we use the proper amounts? Won't that help our trees and simplify our lives? I think so.


Here are some quotes from Walter Pal on fertilizing bonsai:


I use mainly liquid fertilizer that I get from our cheapest general discount market. In America it would be Walmart... I feed from 20 to 60 times more than the average bonsai grower. From the beginning of April to the middle of October, every ten days everything is fed with liquid fertilizer, using three to four times the suggested dose. All trees are fed equally, whether deciduous, conifers, small, large, repotted, collected or not. This is a span of about 200 days when the trees are being fed. Since the trees are fed three times the normal dose on twenty days in that time, it makes for 60 doses of fertilizer in the growing season. The average bonsai grower feeds maybe three or five times at half the normal dose because 'bonsai trees should not grow'. If you then add two times a year of chicken manure being given to the trees, you can then understand why this schedule is 20 to 60 times more than the average.”


“Too much salt in the substrate is almost impossible if one waters aggressively every day. Even azaleas don't mind my treatment. They thrive very well with very hard water, ordinary baked loam and peat as the substrate and aggressive feeding like all the rest of the trees.”


All in all, if it what works for you is best practice. However, high risk pays high rewards. Cheers.

Friday, August 18, 2017

Why I hard prune my ficus and azalea, it hurts me more than it does you

chinese banyan bonsai

We are in full summer now. I have noticed that some of my plants are pushing a flush of new growth. Among the plants pushing the hardest are Guamuchil (Pithecellobium dulce), Coastal Live Oaks, and Chinese banyan.


Regarding branches and leaves when we make bonsai most of us desire that we develop good ramification and in turn, we get leaf reduction. The challenge here is that try as hard as we may, we can only guess as to where the tree will push new buds.


I have noticed that on my Chinese banyan a new branch will grow from the lateral bud closest to the place I pruned. In a lot of trees in front of where a leaf grows, there is a place where a bud can grow. When that bud grows it is called a lateral bud. Sometimes on a Chinese banyan, only the lateral bud closest to the cut will grow. When this happens everything is for not. Why? because what the tree is doing is creating a continuation of the branch. It is replacing the section it lost. What we need is for the branch to split into two smaller branches. This splitting is what creates ramification. What happens is that the mass of the one branch is split into two. The new branches are smaller. The more you continue to do this the finer the ramification. If you replace one branch for one branch then no ramification has happened. You are actually a little behind because you have lost a lateral bud.

lateral bud growing near cut
Only one branch grew. No ramification here.

What are we to do? For ficus and azaleas at least the answer is simple. Hard prune. A hard prune is when you cut-off large portions of many branches.
pre bonsai bonsai
Hard pruned Azalea

Have you ever pruned a tree and got it to the size and silhouette that you wanted? Then the secondary branches grew close to the edge of the cut. Your tree outgrew the silhouette without contributing ramification. You are going to have to get rid of those branches because they make the tree silhouette bigger than what you wanted.  This is where a hard prune comes in handy.


Have you ever looked at your tree and wished that it would back bud from further down the branch closer to the trunk? For ficus and Azalea, a hard prune might be the ticket.


back budding after a hard prune

Some drawbacks to this are that you do not know exactly where the tree will bud. I can live with that. The other is that you might lose a branch, or one of the branches might not bud. That's a harder pill.


This is a good way to fix those leggy ficusses and azaleas. This is a good example of what we want. Where a cut was made there are now three branches. Choose the two branches that are most parallel to the ground.


Let those branches get leggy than prune them close to the trunk. That's how you'll get the desired ramification on azaleas and ficus. Cheers.

Friday, June 2, 2017

Make my garden tree a bonsai


My friend Lucy Ravitch is an amazing math teacher. She has written books for children on math. She posts a video on ideas to teach children math every Thursday (this is the latest one https://plus.google.com/u/0/+LucyRavitch/posts/YMoBuYDupBh). Anywho, She told me that she was looking to get rid of one of her landscape trees. Like any good bonsai lover dreams of yamadori bonsai filled my head.

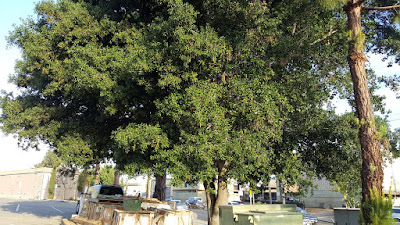
This is the tree in question. My daughter is standing underneath it. This is a strawberry tree, Arbutus Unedo. It is a European tree that grows mostly in the Mediterranean. The best feature of this tree is the reddish-orange fruit and fragrant bell-shaped flowers it has from late fall to winter. It also has a very beautiful flakey bark, and to top it off I love the menthol-like scent it has. Yes, I love this tree.


An added plus is that because it was designed as a topiary tree it has amazing curvy branches.


A few negatives are the reverse taper of the trunk, not all the large branches are at the bottom, and the branches are too long.

Add caption


I started the air layer with a gardening saw. I cut two rings to mark the top and bottom edges of where I am going to remove the bark.


I used a flat gouge to remove the bark. It came off easy, a little too easy. It has very delicate bark. I used my fingers to remove the rest of the bark.


I coated the top edge of the cut with rooting hormone.


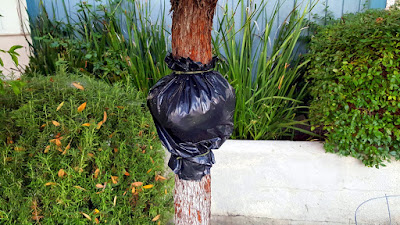
After, I soaked sphagnum moss in water. I cut a heavy duty trash bag to size. The trash bag will hold the sphagnum in place. I squeezed most of the water out of the sphagnum moss and placed it in the bag. I use zip ties to hold everything up.

air layer for bonsai


air layer for bonsai

I am worried that the air layer will not take. I promised to remove the tree by August even if the layer does not take. Also, I have never seen this tree, so I am worried about back budding. I saw a picture of Graham Potter with a huge strawberry tree that was shaped into a bonsai, so I believe that it is possible. Wish me luck. Cheers.


Update 07/31/2017
I went to chop the tree down. I checked the wound for roots. No roots to be seen anywhere. In fact, the tree had a callus forming on the exposed wood. The callus was slimey and spongey.  I was a little disappointed but not surprised.


I decided to move to plan B. I would remove the tree and try to plant it in a pot. It was easy to remove the tree as it had no tap root and all the big thick roots were on the surface. I used a pick to dig a trench around the trunk. When I had dug the trench and cut the branch like roots I used the top of the tree as leverage to sway the tree loose. it took two tugs and a push and the tree was free. I pruned all the branches and took the trunk home. There I used a hand saw to remove about 4 feet of trunk.


I made some clean cuts to the bigger roots. Then buried the roots in a compost, sand, and pumice blend.


Do I think the tree will take? I am hoping so. I will put it in semi shade and water like normal.

Friday, May 12, 2017

ramification of the roots???? can I call it that?

Hi everybody, It's me again. Sometimes I write the darnedest things. This is going to be one of those things. Disclaimer: What I am writing is going to be from research and not experience.

However, I have a personal philosophy. I never discard anything even if it goes against my beliefs or is contrary to what I perceive is logical until I feel I have pondered and meditated thoroughly. Why? Because I do not know everything. My understanding of how things work is in flux. Every time I learn something it adds to how I perceive things. Enough with the philosophy.


In the bonsai world, There are those who claim that field grown trees grow thicker trunks quicker than pot grown trees. The idea is that because the trees root system can develop without any constriction than the tree can reach its full potential. Makes sense, if you give a tree the ability to grow its roots and branches to the greatest possible length then its growth should likewise do the same. OK, I get it.


Let me continue by saying that every method of growing bonsai stock has its problems. It's all a question of which one you would rather deal with. The problems you have to deal with when growing field trees is that most people do not have the space to grow a tree's root system to its full potential. Contrary to garden myths, trees do not grow a root mirror image of the canopy. In fact, roots extend far beyond the edge of the canopy. So, if you can not grow a full root system you can not grow a tree as quickly as it otherwise could. But it will grow faster than it does in a pot Ivan, you say. OK, let's say it does.  You wait 3-5 years growing this tree. Its trunk is large. You need to fit this trunk and its roots in a relatively small pot. You cut down the branches and start to dig a circle 2-3 feet away from the trunk. You are not removing any dirt. What you are doing is using the shovel to slice off all the roots outside of the 2-3 feet circle. Why? Because the tree needs those roots that you cut off. It took 3-years plus to grow them. The idea is that by cutting off the roots the tree will grow more roots in that 2-3 foot circle. Enough roots to keep it alive when you pull it out of the tree a year later. Yes, even after you cut the roots it will take another year until you can pull the tree out of the ground. And guess what? You can't grow 3 years worth of roots in one year. The tree is at a deficit in root mass.


Of course, growing in pots has its disadvantages. We put bonsai tree in pots to slow down the growth. This happens when we have larger plants in growing pots. Even if you grow a seed in a pot after the third year growth will slow down. Not to mention root bound plants. Normally root bound plants present big problems. Roots that grow in circles or in weird directions are a cause for concern. In bonsai, we prune roots every once I a while. those roots might not be that big of a challenge. However, just like in field grown trees pruning a lot of the roots will cause the plant to slow down its growth.


What are we to do? The answer my friends is blowing in the wind, literally. The answer to this is something that I had seen but did not know what it was for.


Air Pruning, Have you ever seen bonsai growing in colanders?  Why would somebody do that? Well here is the idea.


If you grow a tree in a pot the roots will all be watered. The roots will grow like normal. When the roots hit the side of the pot they will start wrapping around the pot. They will grow unchecked in circles.


When you grow a tree in a colander there is air drying out the dirt from every side. When a root grows to the edge it will shrivel and die. There will not be enough moisture to keep the tip of the root alive. The tree will be forced to grow roots from closer to the center of the root mass out. The idea is that because the tree is continually growing roots from the center out it will have a large root mass that will need no pruning, therefore, keeping the growth momentum steady even when transplanted. it's like how we prune trees to build ramification.


Of course, I started my own experiment.

air pruning


Half of these are Japanese Black Pines and the other are Ponderosa pine. I repotted them in hydroponic baskets. My concern is that the baskets might be too small. I used half fine organics with pumice, coarse sand, and perlite in equal parts.  


Two of each pine seedling was placed in the baskets and then placed in a traditional pot. I think that the roots of these will grow out of the baskets.


Cheers.

Update 05/25

As part of the experiment, I potted a couple of trees in the baskets and then slipped them into plastic pots. Tree A is an example of this.


Nice Trunk on this

I did that because I figured it would dry much slower in the two pots. This would protect the tips of the roots as they grew out of the pot. Then I would be able to see if there was progress.


Close Up

I decided to take a look at this tree's roots. when I removed the outer pot I saw this. 


There are actually two roots coming out of the pot. The big one and a smaller one in the back. You can see that the bigger root is already drying out. It is developing a brown spot.


Now, let's look at tree B. It is the same kind of tree California Coastal live oak. It is the same age and about the same size.


I potted these trees in the same soil mix, watered and fertilized the same. same amount of sunlight. All things were equal. yet, there are no roots coming out of this pot or any other of the oaks. Even the cork oak which is still pushing out new leaves has no roots coming out. I would venture to say that the air pruning is working. 


Update 06/02/2017
We have a small problem:


air prune coast live oak

This pot was out drying like normal. I picked it up and noticed a moist circle where it was sitting. I turned the pot over and was happy to see the tree growing many roots. Problem is that I need the roots to shrivel up inside the pot. What is the problem? apparently, the bottom of the pot is retaining too much moisture allowing the roots to stay alive. 

Solution: I need to raise the pots off of the surface covering as little surface area as possible. 

Update 06/15

In my air pruning mania, I potted plants that in hindsight should have not been put in baskets. Here is an example  of one:


Here is a close up:


I saw this and thought that maybe it is not wise to air prune plants that make aerial roots like some ficus species. On the plus side, I know that the tree is growing. 


Friday, April 21, 2017

CA Coastal Live Oak Cuttings, or Driving down the one o one


What is your favorite part of spring? For me, it's softwood cuttings. I am by no means a cuttings master,  but I have had my share of experience. I have made cuttings throughout the year regardless of the season and the ripeness of the branch. Most cuttings grew a few did not. The failure was not related to species. Usually, what happened os that I would prune a plant. Then I would try to root the cuttings. Most would make it but some would not. Yet, I would never have a 100 percent failure. I attribute this to the very mild climate.

I want to try California Live Oak softwood cuttings. I think that it will be successful. Here in southern California, we had lots of rain this winter. The Oaks have pushed out lots of new growth. I have access to many Live oaks so I can take a few cuttings from each and try my luck.


These branches are new and have not lignified. The branches are very flexible. The leaves have hardened though. I am going to take as much of the branch as possible. I am not going to cut any branch smaller than five inches.


For the planting medium, I am mixing vermiculite and perlite in a ratio of 1:1. I am using a taller pot so that I can bury the ends of the cuttings about three inches.


This is what the cuttings look like. It has too many leaves for it to survive. The leaves would cause all the cutting to lose too much moisture through perspiration.


I removed the growing tip and all of the leaves except for the top two. The top two just underneath where I cut the tip off.


Just before I put them in the pot I shaved an eighth of an inch from the bottom of the cutting. I did do it twice per cutting on opposite sites. Then I added rooting hormone and planted the cuttings and watered.

California coastal live oak softwood cutting


Even if they fail I'll be able to try in the winter one more time.

I am hoping for the best. I am trailblazing (That means I did not find any info on the web). Updates sure to follow. Cheers.

Update 05/01/2017:

it was a fail.