Friday, April 21, 2017

CA Coastal Live Oak Cuttings, or Driving down the one o one


What is your favorite part of spring? For me, it's softwood cuttings. I am by no means a cuttings master,  but I have had my share of experience. I have made cuttings throughout the year regardless of the season and the ripeness of the branch. Most cuttings grew a few did not. The failure was not related to species. Usually, what happened os that I would prune a plant. Then I would try to root the cuttings. Most would make it but some would not. Yet, I would never have a 100 percent failure. I attribute this to the very mild climate.

I want to try California Live Oak softwood cuttings. I think that it will be successful. Here in southern California, we had lots of rain this winter. The Oaks have pushed out lots of new growth. I have access to many Live oaks so I can take a few cuttings from each and try my luck.


These branches are new and have not lignified. The branches are very flexible. The leaves have hardened though. I am going to take as much of the branch as possible. I am not going to cut any branch smaller than five inches.


For the planting medium, I am mixing vermiculite and perlite in a ratio of 1:1. I am using a taller pot so that I can bury the ends of the cuttings about three inches.


This is what the cuttings look like. It has too many leaves for it to survive. The leaves would cause all the cutting to lose too much moisture through perspiration.


I removed the growing tip and all of the leaves except for the top two. The top two just underneath where I cut the tip off.


Just before I put them in the pot I shaved an eighth of an inch from the bottom of the cutting. I did do it twice per cutting on opposite sites. Then I added rooting hormone and planted the cuttings and watered.

California coastal live oak softwood cutting


Even if they fail I'll be able to try in the winter one more time.

I am hoping for the best. I am trailblazing (That means I did not find any info on the web). Updates sure to follow. Cheers.

Update 05/01/2017:

it was a fail.


Friday, April 7, 2017

In Bonsai Rules are meant to be broken, or Do bonsai tree "rules" help or hinder bonsai development?

I live in the U.S. but was fortunate enough to play the greatest sport in the world. Yes, I am speaking about rugby. If any sport embodies the pure concept of sportsmanship, athleticism, and determination rugby would be the closest one. One thing was made clear in rugby. They do not have rules. Rugby has laws. These laws are unbreakable. This reinforced to me that rules are meant to be broken.


I would venture to guess that because bonsai culturally came from Japan there is a prevailing idea in the west that the way things have always be done is the way we should do them. This is reminiscent of The Karate Kid. Do not ask why just do. As bonsai has spread over the world every country has made it its own. Except in the west. We cling to our notions of what Japanese bonsai should look like and try to emulate that. Before I start upsetting more people I would like to say that I know I am generalizing.  Yet, if you are new to bonsai you will come across certain rules more often than not.


Brent Walston presents a number of guidelines. He doesn’t like to call them rules but understands that most people do call these guidelines rules. However, these are the most common rules the bonsai neophyte is supposed to use.:


Trunk and Nebari Rules:

1. Height should be six times the caliper of the trunk.
2. Trunk should lean slightly toward the viewer.
3. Trunk should flare at base to visually anchor the plant.
4. Roots should radiate from the flare.
5. No eye-poking roots (directly at viewer).
6. Apex should lean toward viewer.
7. Trunk should taper as it ascends. No reverse taper.
8. Grafts should match understock and scion so that they are unobtrusive, or be placed low enough to disappear into the nebari.
9. Curves in trunk should not result in 'pigeon breast' (roundness toward viewer).
10. Apex should finish in the direction set by the base. 'Flow' should be maintained.
11. Trunk line should not move 'back on itself'. This is one of my rules and difficult to explain. It relates to the flow of the tree. A trunk line that moves back on itself creates a 'C' curve.
12. For formal and informal upright, the apex should be over the base.
13. In informal uprights, too many 'S' curves will be tiresome.
14. As a tree ascends the curves should be closer together (related to branch placement).
15. A tree should have only one apex.
16. Twin tree trunks should divide at the base, not higher up.

Branches:

1. No crossing branches, or branches that cross the trunk.
2. No eye-poking branches (pointed directly at viewer).
3. First branch should be placed approximately one third the height of the tree.
4. Succeeding branches placed at one third the remaining distance to the top of the tree.
5. Branches go on the outside of the curves (No belly branches).
6. Branch caliper should be in proportion to the trunk. Branches that are thicker than one third the trunk caliper will be too thick.
7. First branch should be left (or right), second branch right (or left), third branch should be back branch.
8. Branches should visually alternate, no parallel branches.
9. Branches should diminish in size and caliper as they ascend.
10. There should be space between the branches to 'Let the birds fly through'.
11. First and second branches (Left and Right branches) should be placed forward of the mid line          not directly behind the tree.
13. Only one branch per trunk position, no 'wheel and spoke' or whorled branches, or bar branches (branches directly opposite each other).
14. Branches should create an outline of a scalene triangle with the apex representing God, the middle corner man and the lower corner earth.
15. Secondary branches should alternate left and right and follow the rules of main branch placement, except there should be no secondary branches moving up or down. This creates the foliage pad.
16. To create the illusion of an old tree, wire the branches down. Young trees have ascending branches. The branches near and in the apex can be horizontal or ascend since this is the young part of the tree.
17. Branches for cascades generally follow the rules for uprights, except that the trunk moves down.
18. In twin trees, there should not be branches between the trees which would cross the trunks. The outside branches of both trees creates the triangle of foliage.
19. A jin should not be hidden in foliage.


He even adds a disclaimer to some of the rules:


1. Soils should be uniform, not layered. (New rule, you will still find controversy).
2. Fertilize full strength. (New rule, there will be controversy).


For more of these rules go to: https://www.evergreengardenworks.com/rules.htm


Am I saying these rules are “bad”? No, of course not. What I am saying is that following all these rules will not necessarily produce an aesthetically pleasing tree. In fact, To create a “good” looking tree we will probably have to break some of these rules. This is so especially if you say or believe that bonsai should look like trees in nature.                                                  

Does penjing have as many rules as bonsai? Is penjing a relevant form of miniaturized tree? What about bonsai in the Philippines or Thailand.  Why do I bring that up? Because for the most part they have their own aesthetic conventions and maybe we should too. I have included some pictures of bonsai from the National Bonsai and Penjing Museum that I took on a trip to Washington D.C. These fantastic trees are definite rule breakers.  


chinese elm penjing
Penjing


This is just my opinion. I understand that everybody has an opinion. Cheers.


Friday, March 31, 2017

worlds biggest bonsai


I thought that this was an interesting piece of news. Why? Because the biggest bonsai sounds like an oxymoron. I am not sure if I would consider this a bonsai. Yet, bonsai (盆栽) means tray planting. However, The underlying uniformity of bonsai lies within the miniaturization of said plantings. This is Literally a full grown tree whose roots have been encased in ceramic. Is this Duchampian art created to push our notions of what bonsai is?

Honestly, I for one have not made up my mind. I do not want to be quick to judge. I do want to trust my instinct and perhaps reconcile both.

Let me know how you feel about this. True bonsai? Or bonsai monstrosity? Cheers.


Biggest bonsai


April fool's. Cheers.


Air layer to create a more aesthetic root system

What if you were developing a bonsai but all the roots are growing to one side? What if you find a tree with lots of potential but the soil has left many of the large roots exposed? I had this problem with a Japanese boxwood and a cotoneaster. Now that spring is here I decided to air layer the tree. However, I am not going to separate the tree from its original roots. What I am going to do is encourage new roots to grow from a better position near the base of the tree.

This is the cotoneaster That I am working on. I bought it last year. I rooted some of the cuttings from this tree. It is a fighter.


The problem is that all the roots are growing in one direction. There will never be radial nebari (roots). Problem number two is that the soil line has dropped causing the fine roots to shrivel and die. The main roots have hardened so there is a very minimal to no chance of growing fine roots. I am going to help this tree overcome its challenges.


First, I am going to remove a ring of bark from the two main roots. I need to remove the cambium layer as well. Second, I remove a patch of bark and cambium right under the trunk where the roots start bending away from the tree. I want roots to grow from there especially as there are none.


I apply rooting hormone to the open wounds with a small paint brush. You can actually see the severity of the problem from this angle. I need roots to grow like the rays on a painting of the sun.


Finally, I add this superfine coconut husk medium. It retains water but does not stay too wet. This is experimental as I have never done this with coconut husk. It is fairly inexpensive, It is very compact when you buy it and it seems to retain just the right amount of water. It sold as soilless seed starter in the shape of a brick. Just add water.


I am going to leave this alone through August. How will you know if your plant is ok? When the leaves turn brown I know it was a failure. When there is new growth then all is working fine. That's it for now. I have some updates for some of the other projects that I started last year coming up. Cheers.

Update 07/14

It has been two and a half months. We passed through some heat waves. we passed through time. I felt that it was time to review the root progress.


Everything looked normal until I popped the tree out of the pot. There I saw big new roots growing from the coconut coir down into the sandy soil. This was a very good sign.


I dug around and removes the coconut coir. I was pleasantly surprised to find that there was a thick root mass growing right at the air layer.


New roots on top mean I can slice off part of the root system at the bottom. But best of all the new roots will cover that ugly tap root that was keeping this tree from reaching its full potential.

Friday, March 24, 2017

Juniper cuttings, we were cloning before we knew what cloning was

Have you ever pruned a tree and wish you could do something with the pieces that were cut off? Have you ever wished you can make a clone of a favorite tree? Well, People have been doing exactly that for over a thousand years.


This year I bought my first shimpaku juniper. I was very excited. It was late winter/ early spring (Los Angeles winter). I bought a few shimpaku for a great price. I pruned a couple of trees and I decided to save the cuttings and try to root them.


I have tons of experience rooting ficus. Heck, ficus roots almost by accident. There is no challenge in that. I have rooted rosemary, cotoneaster, and Japanese boxwood. That's the extent of my experience.

The following pictures are of a Hollywood juniper (Juniperus chinensis 'Torulosa'). These junipers grow tall and thick. The point of interest are the branches which grow like the conifers in Vincent Van Gogh’s Starry Night. However, I made shimpaku cuttings earlier that week.

I needed coarse sand. I have looked high and low for coarse sand. I even went to some mountain rivers to collect it. That sand turned out to be decomposed granite which is great but it takes a huge effort to collect. I found a bag of sand used in construction at a big box home improvement place. I sift out the fine sand and keep the large stuff. I think i paid $3.00 U.S. for a 50lb bag (22kg). I would say that about two-thirds of the bag is coarse sand.


sand after sifting
I mixed perlite with that sand. I need the soil to drain quickly and retain some of the moisture. I did not sift the perlite.


Then I mixed peat moss. The ratio was about 1:1:1.


one gallon pot
I grabbed the juniper branch that I collected. I chose some branches that were not too big or not to small.

hollywood juniper cloning

I trimmed all the needles and smaller branches that have been growing near or at the bottom third of the cutting. Then at the bottom, I scrape off a piece of the bark. See the light color tip near where I cut the branch off? I should have scraped twice that amount or even more.

hollywood juniper cutting


That is where the roots are going to grow. I added rooting hormone and placed the branches as far down as the lowest needle. Then I watered the pot trying to thoroughly soak the soil.


Left Hollywood juniper, right shimpaku


That is it. I hope they root because I already have plans for all these baby clones. No, I am not building a clone army. I buy bonsai pots that I like then I make bonsai for them. I have a set of three bonsai pots I think should be for conifers only.


Cheers.

Update 06/05/2016

It's been three months since I potted the juniper cuttings.


Many people are tempted to tug on the cuttings to see if they have rooted. This is not such a good idea. If you tug you may break the roots that have already grown. You just have to wait it out. If the cutting turns brown it has failed. New growth means that the cutting has taken.
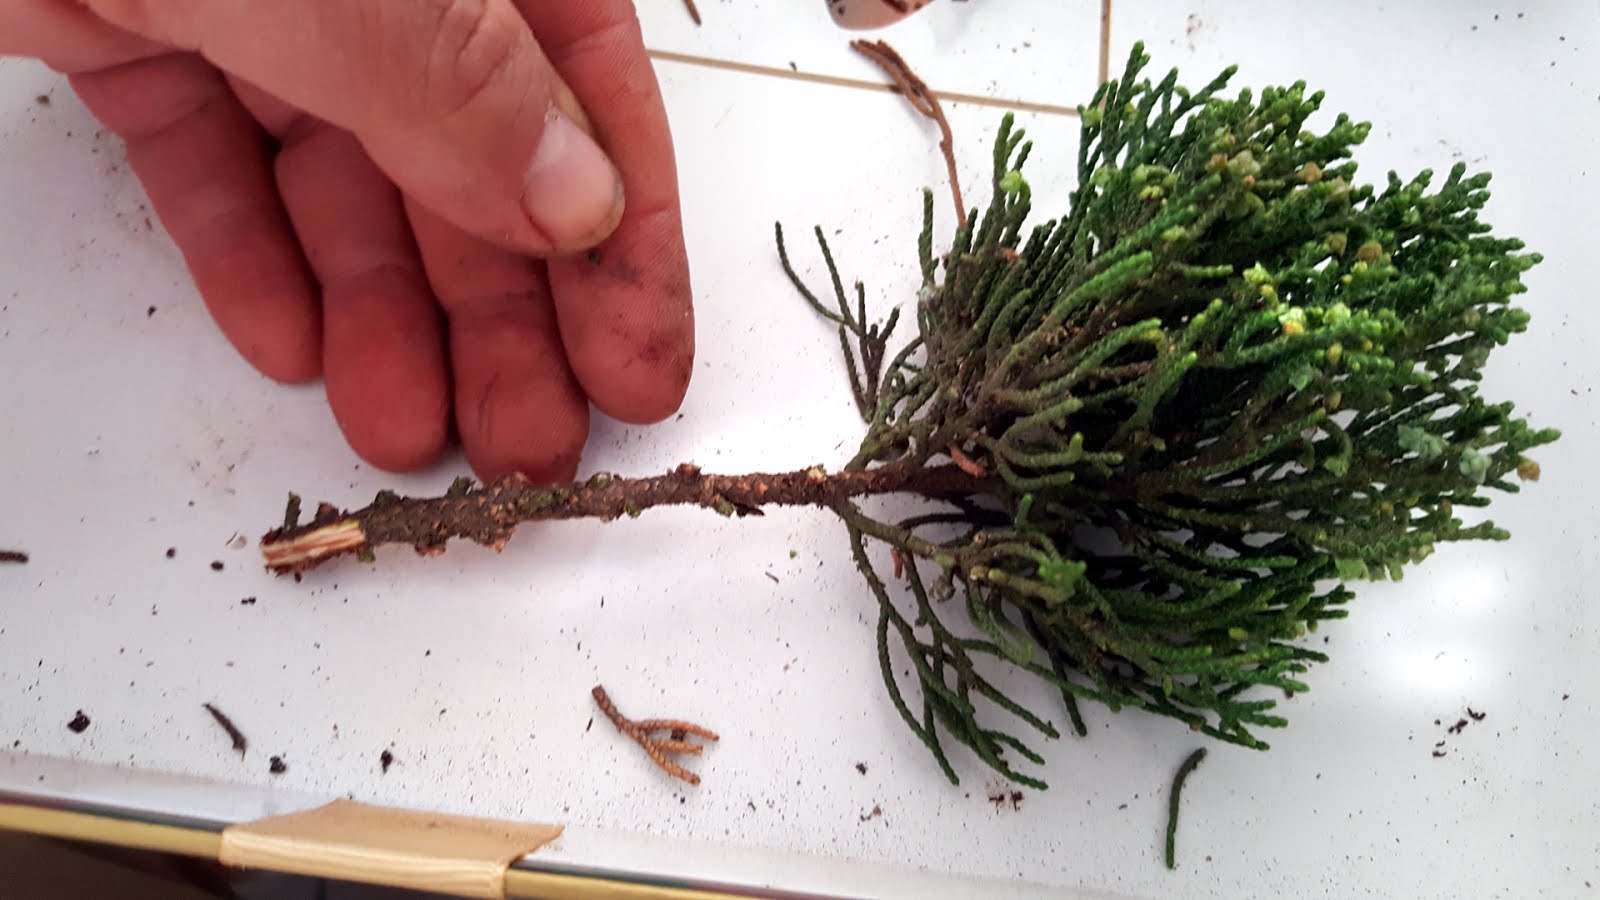
New growth means new roots

I noticed that the thicker cuttings had more and longer roots.


Friday, March 17, 2017

Ikea training bonsai pots, how to

I am always looking to improve on what i use for my bonsai. I use a lot of plastic pots for growing my bonsai. However, when my trees start to develop but are not yet ready for a bonsai pot I like to use terracotta pots. They are heavy, they lose more water than plastic pots, and I like the way they look. The problem is that I could only find tall ceramic pots when what I needed was low wide ones.


My wife dragged me to Ikea one day. I hate going there. I feel like a lab rat running through a maze. At Ikea you start at the top floor. You walk around what seems like a maze picking up items as you go. To be honest my favorite level is the bottom one. It's not my favorite because it's the end, or because they sell food there. It's my favorite because it has all the gardening stuff.


So, one day my wife drags me down to Ikea. I am bored beyond belief. Finally, I see that we are about to go to the register. I spot orange in the distance in between the indoor palm fronds. I go there and notice a pot with a tray. The best part is it is only 3.00 U.S. I leave the pot and take the tray. The cashier tells me that I have to buy both. O.K., whatever. Ill jump what ever hoop I need to buy the tray.

The one negative is that it is a drainage tray so it had no hole. Well, that's easily taken care of.

For this demonstration my beautiful daughter will be assisting me.


As you can see the problem is that there is no drainage hole.

pot saucer


A masonry bit will do the trick. When you make a small hole you can see through turn it around and finish the job.


There you have it. One hole in one pot. Now you can grow and develop a bonsai tree in it.

All done


The pots come in three sizes. The one that we used as an example is the smallest one. I do use the bigger original pot. I grow seeds in them. I hope this helps further the art of bonsai in some small way. Cheers.